
As the DDEV documentation puts it:
DDEV is an open-source tool that makes it dead simple to get local PHP and Node.js development environments up and running in minutes.
Why DDEV? (And what’s a Docker anyway?)
Before we get our hands dirty, let’s understand the engine under the hood: Docker.
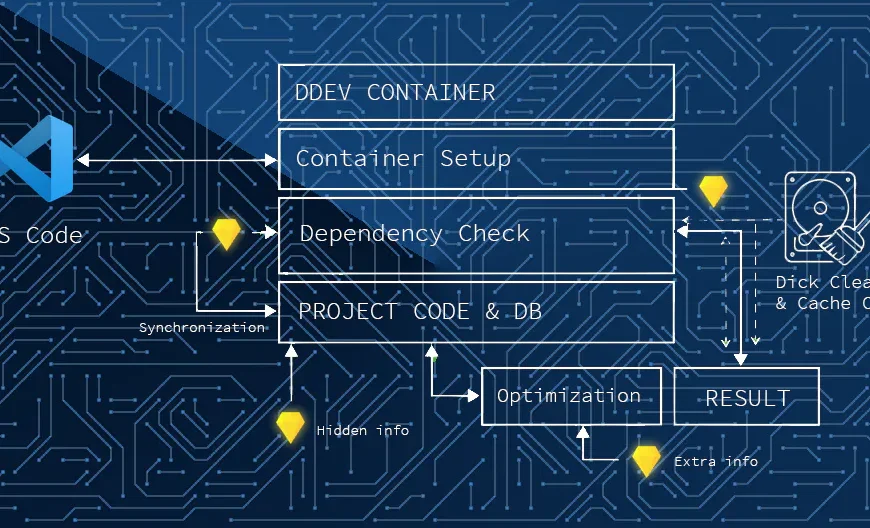
- What is Docker? Think of it as a shipping container. Inside, you pack everything your site needs (web server, database, PHP). It works exactly the same on any computer, completely isolated from your main operating system.
- The DDEV Advantage: DDEV uses Docker to solve the “it works on my machine” syndrome. It provides isolation (run PHP 7.4 on one project and 8.3 on another without them fighting), standardization (your whole team uses the exact same setup), and cleanliness (no leftover software junk when you delete a project).
- The Conductor: DDEV is the director of the orchestra. Instead of you writing complex configuration files, DDEV writes them for you and tells the containers exactly how to talk to your browser.
Enough talk. Let’s get to work.
Step 1: Making Room for Linux (WSL2)
First, we need to tell Windows to make some space for Ubuntu.
- Click the magnifying glass (Search) and type PowerShell.
- Right-click PowerShell and choose “Run as Administrator”.
- In the blue window, type this command and hit Enter: wsl –install
- Windows will download the necessary components. Once finished, it will tell you a restart is required. Go ahead, I’ll wait.
Step 2: Your First Date with Ubuntu
After the reboot, a black window will pop up. This is Ubuntu. Don’t panic; it doesn’t bite.
- Wait: Windows is unpacking Linux. This takes a minute or two.
- Username: When prompted for a
UNIX username, type your name (lowercase, no spaces) and hit Enter. - Password: It will ask for a password. Pro tip: As you type, nothing will move—no dots, no stars. It’s a Linux security feature to keep you on your toes. Type it anyway and hit Enter.
- Confirm: Type it again. When you see a colorful line ending in
$, Ubuntu is ready.
Free advice: Pin this window to your Taskbar. This is your command center.
Step 3: The Fork in the Road (Docker & DDEV)
Now we need Docker. You have two options: the “Windows Way” or the “Linux Way.”
Option 1: The Windows Way (Docker Desktop)
This is the “standard” route, but it’s a bit like using a translator to talk to someone in the same room—it works, but it’s slower.
- Download Docker Desktop for Windows.
- Crucial: During installation, ensure “Use WSL 2 instead of Hyper-V” is CHECKED.
- Once installed, go to Settings > Resources > WSL Integration and toggle the switch for “Ubuntu” to On.
Installing DDEV: Go to the DDEV Releases page and download the file ending in _windows_amd64_installer.exe. Run it like any other program. If Windows says it “protected your PC,” just click “More info” and “Run anyway.”
Option 2: The Linux Way (Docker CE) – Recommended
This is for the pros. By installing Docker directly inside Ubuntu, you save RAM and everything runs significantly faster because there’s no “Windows bridge” in the middle.
The Clean Slate: If you already tried the Windows way and want to switch, run ddev poweroff and uninstall Docker Desktop first.
The Installation: Open Ubuntu and run these commands one by one:
# Remove old versions
for pkg in docker.io docker-doc docker-compose docker-compose-v2 podman-docker containerd runc; do sudo apt-get remove $pkg; done

# Install dependencies
sudo apt-get update
sudo apt-get install ca-certificates curl gnupg

# Add Docker’s official GPG key
sudo install -m 0755 -d /etc/apt/keyrings
curl -fsSL https://download.docker.com/linux/ubuntu/gpg | sudo gpg --dearmor -o /etc/apt/keyrings/docker.gpg
sudo chmod a+r /etc/apt/keyrings/docker.gpg

# Add the repository
echo \
  "deb [arch=$(dpkg --print-architecture) signed-by=/etc/apt/keyrings/docker.gpg] https://download.docker.com/linux/ubuntu \
  $(. /etc/os-release && echo "$VERSION_CODENAME") stable" | \
  sudo tee /etc/apt/sources.list.d/docker.list > /dev/null

sudo apt-get update
sudo apt-get install docker-ce docker-ce-cli containerd.io docker-buildx-plugin docker-compose-plugin
sudo every time, run:sudo usermod -aG docker $USER
newgrp docker
Handling SSL Certificates
To make your browser trust your local sites, run:
Bash
ddev trust
The Firefox Exception: Firefox is stubborn and uses its own certificate store. To fix this, navigate to this path in Windows Explorer (yes, you can just paste this into the address bar):
\\wsl$\Ubuntu\home\<your_username>\.local\share\mkcert\
Find rootCA.pem, copy it to your Desktop, and import it into Firefox Settings > Privacy & Security > Certificates > View Certificates > Authorities. Now Firefox will trust DDEV blindly.
Launching Your First WordPress Site
Time to see the magic. Let’s build a site without ever touching a .zip file.
 mkdir ~/websites/my-new-site
 cd ~/websites/my-new-site
ddev config --project-type=wordpressddev start
ddev wp core downloadddev wp core install --url=https://my-new-site.ddev.site --title="My New Site" --admin_user=admin --admin_email=your@email.com --admin_password=secret_passwordPro-Tip: The wp-config.php Guard
DDEV creates a wp-config-ddev.php file. To ensure your site works both on DDEV and when you eventually push it to production, wrap your wp-config.php database settings like this:
PHP
/** If DDEV exists, use it. Otherwise, use production settings */
if (file_exists(__DIR__ . '/wp-config-ddev.php')) {
    include __DIR__ . '/wp-config-ddev.php';
} else {
    define( 'DB_NAME', 'your_prod_db' );
    define( 'DB_USER', 'your_prod_user' );
    define( 'DB_PASSWORD', 'your_prod_pass' );
    define( 'DB_HOST', 'localhost' );
}
This also prevents the annoying Constant WP_DEBUG already defined warning.
There you go! You are now the proud owner of a high-performance, professional development environment. Whenever you’re ready to work, just open Ubuntu, cd into your project, and run ddev start.
1. DDEV for Dummies 2: Troubleshooting, Pro Commands, and Hidden Gems
2. DDEV for Dummies 3: VS Code Integration, Troubleshooting, and Disk Cleanup

Leave a Reply