Introduction
When I started to learn Laravel, I have choosen to use Homestead, the “pre-packaged Vagrant box that provides you a wonderful development environment without requiring you to install PHP, a web server, and any other server software on your local machine.”
Actually, I already had Php installed on my machine, as well Apache server and MySql, but I thought it would have been a good opportunity to learn something new.
Though the official documentation is quite complete, I needed some more help: I didn’t know anything about Vagrant, I didn’t use Composer, nor Git (I use Mercurial).
So I have googled a bit and I have found some great tutorial. Well, I don’t know if this happens only to me, but I can guarantee you that to me it often happens indeed: I follow some “Ultimate tutorial” or some “Definitive guide to…” and what is was promised to work fails with errors that seem to be unknown to everyone else! It’s really frustrating, isn’t it?
For this reason, I’m going to tell you how I have installed, setup and finally got working a Laravel Homestead environment, mentioning the different issues I’ve got into and illustrating the solution I have found.
Notice: for some parts of the process (as the installation of some software) I’ll give you the links to the official documentation or to some useful article I have found without duplicating here that content. But in general, you should be able to get everything setup and running just reading this article. Or so I hope 🙂
Let’s start with Laravel Homestead.
Required software
To use Laravel Homestead you need to first install some software:
- VirtualBox (https://www.virtualbox.org/wiki/Downloads)*: VirtualBox will run Homestead virtual machine with everything we need: an operating system (as I’m writing is Ubuntu 16.04), Php, several database engines and more (for the full list refer to the official documentation: https://laravel.com/docs/5.5/homestead)
- Composer (https://getcomposer.org/doc/00-intro.md): used to create laravel projects and manage all their dependencies; the easiest way to get Composer up and running in Ubuntu is just sudo apt-get install composer
- Vagrant (https://www.vagrantup.com/downloads.html): used to run the Homestead virtual machine on the fly and access its contents directly from your host (you’ll can use your web application directly from your browser without the need to use a browser installed in the VM, for instance)
- Git (https://git-scm.com/downloads): used to generate the SSH key used by Vagrant to authenticate the server connection (in Ubuntu just sudo apt-get install git )
*it’s not mandatory to use VirtualBox: you can also use Hyper-V, VMWare or Parallels if you feel more comfortable.
Installing these software is quite easy and painless. Just be sure to get the latest versions of them. Especially for VirtualBox, Laravel requires it be version 5.1 or greater. So, if you have VirtualBox already installed, be sure to check its version: just start VirtualBox and the software itself will notify you if a more recent version is available for your system.
If instead you have to install VirtualBox from scratch you can follow this tutorial: https://www.pcsteps.com/184-install-virtualbox-linux-mint-ubuntu/: skip everything talks about distro software managers and jump to the section where the author teachs you how the get the latest VirtualBox version for your distro (Windows users have just to download and run the installer from the official site).
For the rest you can just refer to links above.
As I said, I didn’t find any problem installing any of these softwares so I won’t spend other time on this.
Starting with Laravel
When you have all softwares installed, just open the command prompt on Windows or a terminal window in Linux (from now on I’ll just call it CLI) and type:
vagrant box add laravel/homestead
You’ll be asked if you want to use Hyper-V, Parallels, VirtualBox or VMWare: select your virtual environment of choice and press Enter. This will download the Homestead virtual box and it will probably take sometime to finish, so feel free to take a break.
The next step is to download the command line interface for Homestead. Open your CLI and navigate to the folder where you want to store your Laravel projects in (for this article I’ll assume it will be C:\Users\<USER_NAME>\ in Windows and just your home ~/ in Linux) and type:
git clone https://github.com/laravel/homestead.git Homestead
This will create a folder called Homestead. Let’s enter it from CLI and initilize Homestead:
cd Homestead
bash init.sh
The response will be an enthusiastic “Homestead initialized!”. Sounds good, isn’t it? But what does it mean? Simple: it means that in your Homestead folder has been created the Homestead.yaml file, isn’t it fantastic? In fact, Homestead.yaml file will allow you to setup your sites and your shared folder. Okay, it can sound obscure this, I admit, but be patient: I promise it is quite simple and I’ll explain soon.
A SSH key, please.
Now we have first to create a SSH key to allow us to be authenticated in our server in Vagrant box.
Linux users can just use their standard CLI, Windows users can use Git Bash (just right click on your Desktop and click Git Bash to open it; it is like a command prompt but with something magic). Are your ready? Ok, type in this:
ssh-keygen -t rsa -C "yourname@homestead"
Do really I have to tell you? I’m sure I don’t but, well, just to be clear about this: replace “yourname” with… your (user) name.
This will create a hidden folder called “.ssh” in your Home directory for Linux users (~/), in your personal folder for Windows users (C:\Users\<USER_NAME>) and it will put your SSH key in this folder. We’ll have to refer to this when we’ll be setting up our Homestead.yaml file. That is, right now!
Homestead.yaml file: section 1
Actually, Homestead.yaml file borns almost perfect. Let’s analyze the important things.
---

ip: "192.168.10.10"

memory: 2048

cpus: 1

provider: virtualbox
At the top of the file you see an IP address: this will be used to access your sites/web applications. You can change it, if you have a good reason to do it, but as it is it works fine. We’ll use this IP address later to set up our hosts file.
The other important setting is the provider: it is already set to “virtualbox” so we can be happy an go ahead 🙂
Homestead.yaml file: section 2
Then we have to set the path to our SSH key and the key file itself:
Linux
authorize: ~/.ssh/id_rsa.pub

keys:

- ~/.ssh/id_rsa
Windows
authorize: c:/Users/marco/.ssh/id_rsa.pub

keys:

- c:/Users/marco/.ssh/id_rsa
Homestead.yaml file: section 3
Then we find the folder section. Here we set the shared folder: basically, we tell our virtual machine where the code of our website/application resides so it can execute it.
Linux
- map: ~/Homestead/Code

to: /home/vagrant/Code
Windows
- map: C:/Users/<USER_NAME>/Homestead/Code
to: /home/vagrant/Code
Homestead.yaml file: section 4
Finally, we have to set up our sites, decide what our domains will be and tell the virtual machine where the relative code can be found (we can ignore the rest of Homestead.yaml file and leave it as it is). Let’s imagine we want our first domain for our first Laravel site/application be firstlaravel.app (this will be identical for both Linux and Windows users):
sites:

- map: firstlaravel.app

to: /home/vagrant/Code/firstlaravel/public
Wait a moment: what’s that “Code” folder? It’s the folder where we keep all our projects but we have to create it. Go to your file manager, open your Homestead folder and create a folder giving it the name “Code”.
Now, open your CLI in “Homestead/Code” folder and type:
composer create-project laravel/laravel firstlaravel --prefer-dist
This will create a new Laravel project with the following path
Linux: ~/Homestead/Code/firstlaravel
Windows: C:\Users\<USER_NAME>\Homestead\Code\firstlaravel
3 laps to go!
Just 3 little steps:
- we have to modify our hosts file adding the IP we have in our Homestead.yaml file. Linux users will find hosts file in /etc/ directory, Windows user will find it in C:\Windows\System32\drivers\etc; here we have to add the following line:
192.168.10.10 firstlaravel.app
This way we’ll be able to use our domain to load the application in our browser.
- In our CLI we have now to initialize Vagrant; navigate to your Homestead folder and type:
vagrant init
This will initialize “current directory to be a Vagrant environment” (https://www.vagrantup.com/docs/cli/init.html)
- Start our virtual machine: stay on your CLI and type
vagrant up
and wait your CLI return to the command prompt. Now your Homestead virtual machine is up and running.
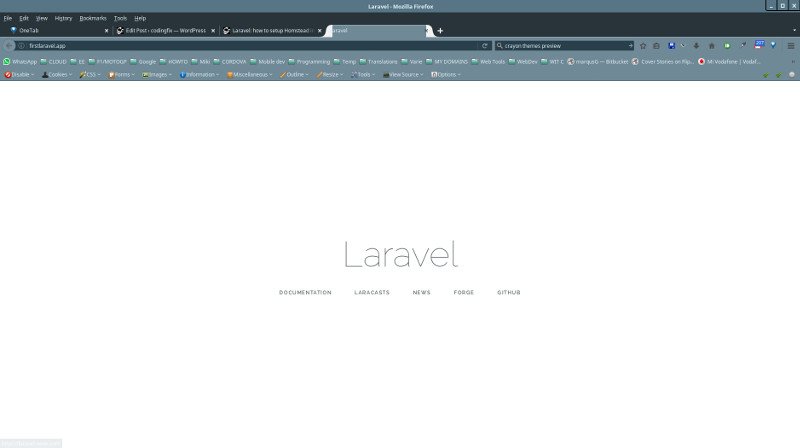
Now you can finally launch your browser and just type firstlaravel.app in the address bar and, if everything is good, you should see the standar welcome page of Laravel:
Something more
Adding other projects
As natural, we can expect we’ll create other Laravel projects, not just one. In this case, after having create the new project with the command
composer create-project laravel/laravel firstlaravel --prefer-dist
from you Homestead/Code folder you have to do these simple steps:
- Open Homestead.yaml file, go to the site section and add your new project there; supposing the new project be called secondlaravel.com the new section should looks like this:
sites:

- map: firstlaravel.app

to: /home/vagrant/Code/firstlaravel/public

- map: secondlaravel.com

to: /home/vagrant/Code/secondlaravel/public
- Open hosts file and add the following line:
192.168.10.10  firstlaravel.app
192.168.10.10  secondlaravel.com
- Open your CLI in your Homestead folder and type vagrant provision or vagrant reload in order your changes take effect.
Issue 1:
I have already mentioned this but I repeat it again here: if you run vagrant up and everything looks good but trying to navigate to your app with the browser raises a “Timed out” error check your VirtualBox version and in general be sure you have the latest versions installed for each piece of software you’re using.
Issue 2:
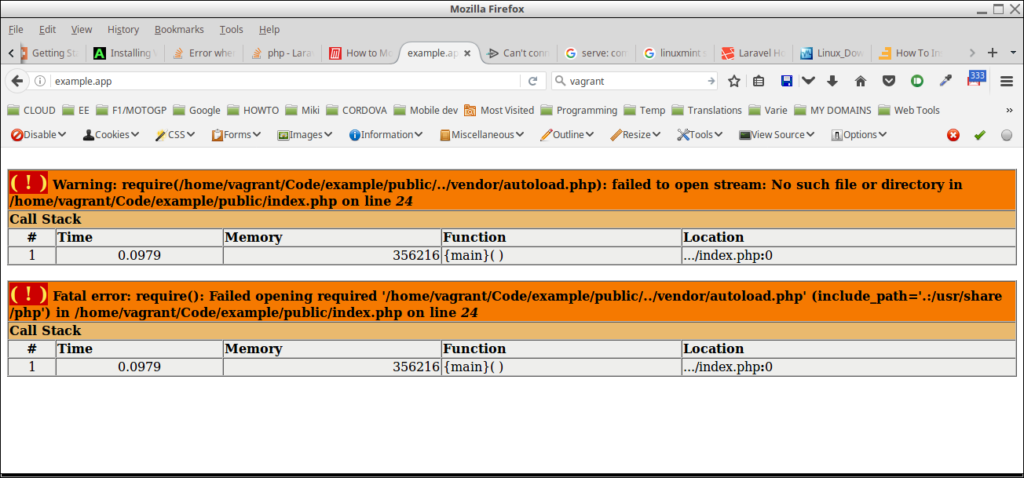
Both in Linux and in WIndows my first attempt to access my application has been frustrated by the following warning:
If this happens even to you, just open your CLI in your app folder (Homestead/Code/firstlaravel) and type this command:
composer update --no-scripts
This command could give you some errors: for instance I saw it to fail if phpunit is not installed or if mbstring extension is missing. Just install al missing libraries once at a time to make it run (in WIndows just use installers, in Ubuntu use sudo apt-get install phpunit and sudo apt-get install php7.0-mbstring ). It will be annoying, I know, but this what I did to solve the issue in my Linux Mint and I don’t know any alternative more comfortable way 🙂
Issue 3:
You could get a page similar to the one above mentioning some missing software. For instance, in my system I was missing PhpUnit and this prevented me to access my application. I have just installed PhpUnit with the following comands and the error has gone. So I have had to install PEAR and PhpUnit. If this happens to you, I suggest to read this useful document: https://phpunit.de/manual/current/en/installation.html.
Issue 4:
If something goes wrong, Laravel message is a bit cryptic:
Whoops, looks like something went wrong.
If you want to get Laravel show full debug information in the browser, rename the file .env.example in your project folder (firstlaravel/ in our example) to .env. Then open it with a text editor and be sure the value of APP_ENV be local:
APP_ENV=local
Issue 5:
Once you have set Laravel to show debug infos, you could get into this message:
RuntimeException No application encryption key has been specified.
If this happens even to you, don’t panic: just open your CLI in your project directory (firstlaravel/) and type this command:
php artisan key:generate
Warning: Before you can use this command, you must rename the .env.example file to .env otherwise you’ll get this error
file_get_contents(/home/marco/Homestead/Code/firstlaravel/.env): failed to
open stream: No such file or directory
That’s all, folks… really?
This is how I have successfully setup a Homestead environment in Linux Mint 18.2 and WIndows 10 running in my dual boot machine.
I sincerely hope you won’t get any other issue but if you do, feel free to post here a comment: we will can make this article better 🙂 Thank you!


